Engineered hardwood floors are durable and visually appealing, consisting of a hardwood veneer over plywood or HDF for stability against moisture and temperature changes. Scratches and dents are common, and the top wear layer determines durability and repairability—thicker layers allow refinishing, while thinner ones may limit your options. Knowing the thickness of your wear layer can guide you in choosing the right repair methods.
Common Causes of Scratches and Dents
Scratches and dents on engineered hardwood floors can arise from various sources, often resulting from routine household activities. One of the most frequent culprits is furniture movement. Without proper protection, dragging chairs or tables across the floor can leave unsightly marks. Using felt pads or furniture coasters can significantly reduce this risk.
Pets are another common cause of scratches. While you may love your furry friends, their claws can cause considerable damage to your floors. Regular grooming and keeping your pet’s nails trimmed can help maintain the condition of your flooring. Additionally, placing rugs or mats in high-traffic areas can offer an extra layer of protection against scratches and dents. Many homeowners turn to the highest-rated engineered wood flooring company for expert advice and installation, helping ensure their floors stay in excellent condition.
Everyday foot traffic, particularly in homes with children, can also contribute to wear and tear on your floors. Grit and small particles trapped underfoot can act like sandpaper, gradually scratching the surface. Implementing a no-shoes policy indoors and placing doormats at entrances can help minimize this issue, preserving the beauty of your engineered hardwood floors.
Tools and Materials Needed for Repairs
Repairing scratches and dents in engineered hardwood floors requires specific tools and materials to achieve the best results. Here’s a list of essentials you’ll need to get started:
- Microfiber Cloths: For cleaning and polishing the floor surface.
- Wood Filler or Wax Sticks: To fill scratches and blend seamlessly with the floor’s colour.
- Putty Knife: For applying filler smoothly.
- Fine-Grit Sandpaper: To sand the repaired areas, ensuring a smooth finish.
- Hardwood Floor Cleaner: Specifically formulated to clean without damaging the floor’s finish.
- Protective Gloves: To safeguard your hands during the repair process.
Depending on the extent of the damage, you may also need additional tools such as a heat gun or steam iron for repairing deeper dents. Before beginning repairs, gather all necessary materials and prepare a clean, clutter-free workspace to ensure a smooth and efficient process.
Investing in quality repair products can make a significant difference in the outcome of your efforts. Choose fillers and wax sticks that match your floor’s colour, ensuring a seamless blend with the existing finish. By having the right tools and materials on hand, you’ll be well-equipped to tackle any scratches or dents that may arise.
Step-by-Step Guide to Fixing Scratches
Repairing scratches on engineered hardwood floors involves a systematic approach to restore the surface to its former glory. Follow these steps to effectively address scratches:
Step 1: Clean the Area
Begin by cleaning the scratched area thoroughly using a hardwood floor cleaner and a microfiber cloth. Removing dust and debris ensures that the repair materials adhere properly and achieves a smooth finish.
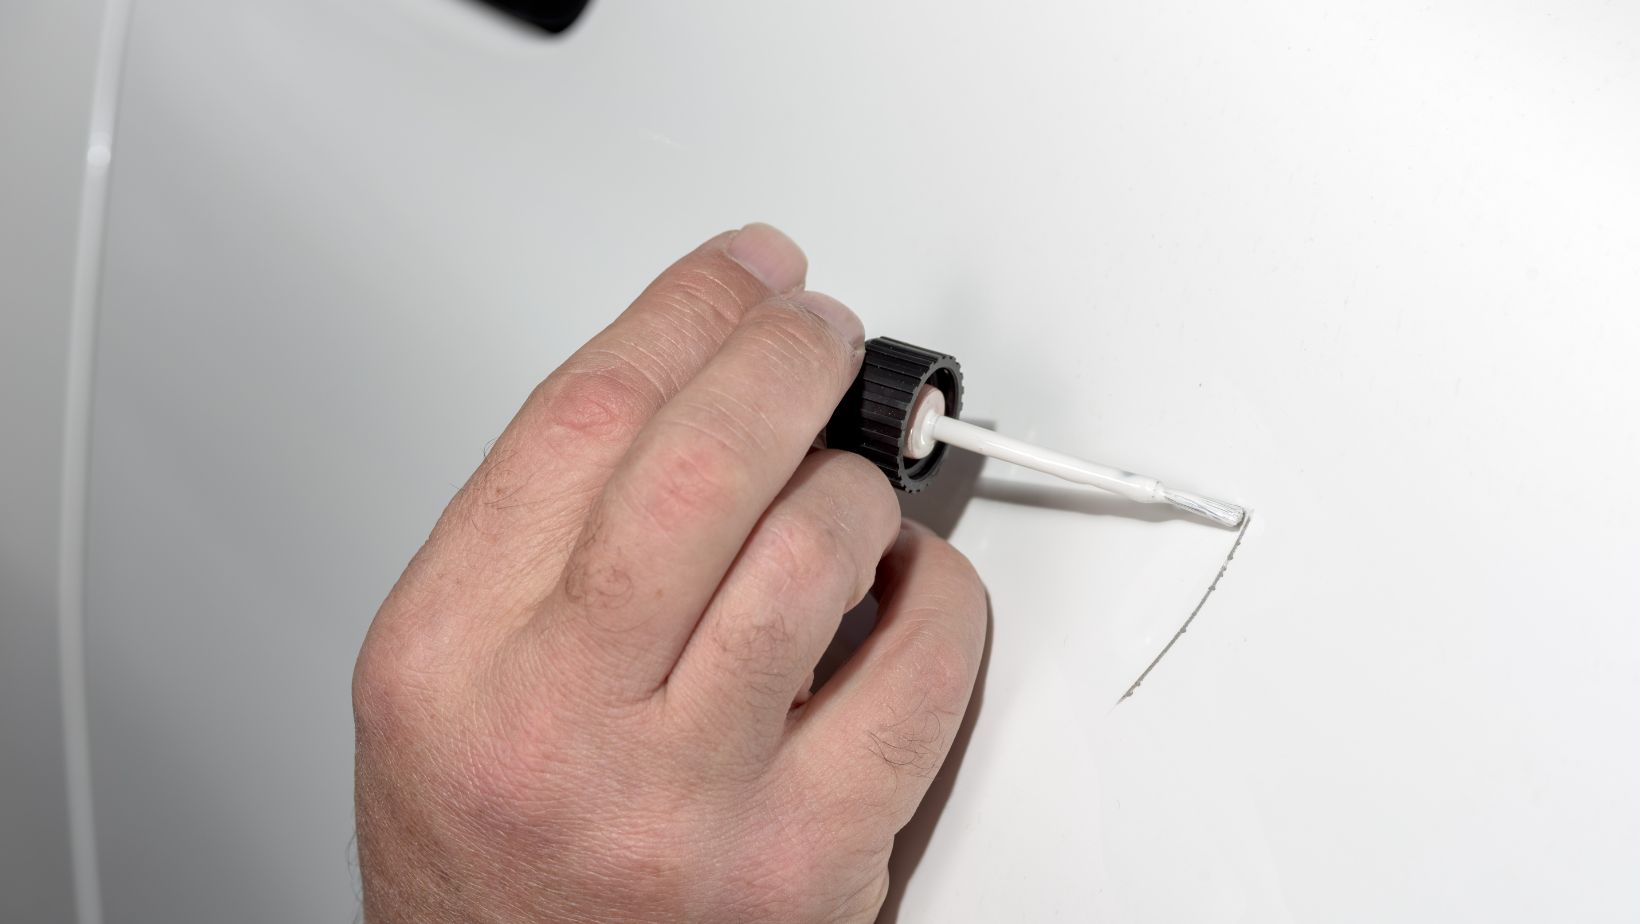
Step 2: Apply Wood Filler or Wax Stick
Select a wood filler or wax stick that closely matches your floor’s colour. Use the putty knife to apply the filler into the scratch, filling it completely. If using a wax stick, rub it back and forth over the scratch until it’s filled. Ensure an even application for a seamless repair.
Step 3: Sand and Buff
Once the filler has dried, use fine-grit sandpaper to gently sand the repaired area. This step helps to level the surface and remove any excess filler. After sanding, buff the area with a clean microfiber cloth to restore the shine and blend the repair with the surrounding floor.
Step 4: Seal the Repair
To protect the repaired area and restore its sheen, apply a compatible floor finish or polyurethane sealant. Allow it to dry completely before resuming regular use of the floor. This sealing process helps to ensure the longevity of the repair and maintain the floor’s appearance.
How to Repair Dents in Engineered Floors
Repairing dents in engineered hardwood floors requires a slightly different approach compared to scratches. Here’s how to tackle dented areas effectively:
Step 1: Assess the Damage
Examine the dent to determine its depth and severity. For shallow dents, a simple steam method may suffice, while deeper dents might require wood filler for a more comprehensive repair.
Step 2: Use a Steam Iron
For shallow dents, place a damp cloth over the affected area. Use a steam iron set to medium heat and press it gently over the cloth for a few seconds. The steam will cause the wood fibres to swell, reducing the dent’s visibility. Repeat as necessary until the dent is minimized.
Step 3: Fill Deep Dents
For deeper dents, apply wood filler to the affected area using a putty knife. Ensure the filler is level with the floor’s surface, and allow it to dry completely. Once dry, sand the area with fine-grit sandpaper for a smooth finish.
Step 4: Finish and Seal
After repairing the dent, apply a suitable floor finish or sealant to protect the area and blend it with the rest of the floor. Allow the sealant to cure fully before walking on the repaired section.
Repairing dents may require patience and precision, but with the right techniques, you can restore your floors to their original condition, preserving their beauty and functionality.
Preventative Measures for Future Damage
Preventing future scratches and dents on your engineered hardwood floors is crucial to maintaining their appearance and longevity. Here are some effective strategies to safeguard your floors:
- Use Area Rugs and Mats: Place rugs or mats in high-traffic areas, such as entryways and hallways, to protect the floor from dirt and debris. This simple measure can significantly reduce wear and tear.
- Furniture Pads: Attach felt pads to the legs of furniture to prevent scratches when moving pieces around. Regularly check and replace these pads to ensure continued protection.
- Implement a No-Shoes Policy: Encourage family members and guests to remove their shoes before entering the home. This practice minimizes the introduction of grit and dirt, reducing the risk of scratches.
- Regular Cleaning Routine: Maintain a consistent cleaning schedule using products specifically designed for hardwood floors. Regular dusting and mopping can help prevent the buildup of particles that could scratch the surface.
- Control Indoor Humidity: Engineered hardwood floors can react to changes in humidity. Use a humidifier or dehumidifier to keep indoor humidity levels stable, preventing warping and damage.
Summary
Engineered hardwood floors add elegance and sophistication to any home, and keeping them in top condition enhances their appeal. Taking preventative measures is equally important in preserving the integrity of your floors. Simple practices, such as using furniture pads, implementing a no-shoes policy, and maintaining a regular cleaning routine, can go a long way in preventing damage. These efforts ensure your floors continue to look new and inviting.