Diamond painting combines the precision of cross-stitch with the vibrancy of paint-by-numbers to create stunning mosaic artwork. Starting a diamond painting project is straightforward – simply unroll the canvas on a clean surface, match the colour codes to the provided chart, and begin placing tiny resin diamonds onto their corresponding symbols.
The art form has gained popularity as a relaxing hobby that produces beautiful results. Diamond painting kits by Figured’Art provide everything needed to start creating sparkly masterpieces, including a pre-printed canvas, colourful resin diamonds, and essential placement tools. The methodical nature of placing each diamond creates a meditative experience that helps reduce stress while fostering creativity.
A smooth workspace and proper organization make the creative process more enjoyable. When diamonds are sorted by colour and tools are kept within reach, artists can focus on watching their masterpiece come to life one sparkling piece at a time.
Key Takeaways
- Diamond painting requires minimal setup and basic supplies to begin creating artwork
- Proper organization of materials ensures a smooth and enjoyable creative process
- Regular practice develops techniques for precise diamond placement and stunning results
Getting Started with Diamond Painting Kits
Diamond painting combines the precision of cross-stitch with the simplicity of paint-by-numbers, creating stunning mosaic artwork using tiny resin drills. The right kit and proper setup make all the difference in creating a successful first project.
Choosing Your First Diamond Painting Kit
Beginners should start with a smaller canvas, ideally 30×30 cm or less. Square drills are more precise but round drills are easier to place.
Select a design with distinct colour blocks and minimal intricate details. Full drill canvases offer complete coverage, while partial drill designs leave portions of the printed image visible.
Look for kits that include quality components:
- Premium adhesive canvas
- DMC-coded resin drills
- Ergonomic applicator tool
- Comfort grip stylus
- Wax pad or pink wax
- Sorting trays with grooved edges
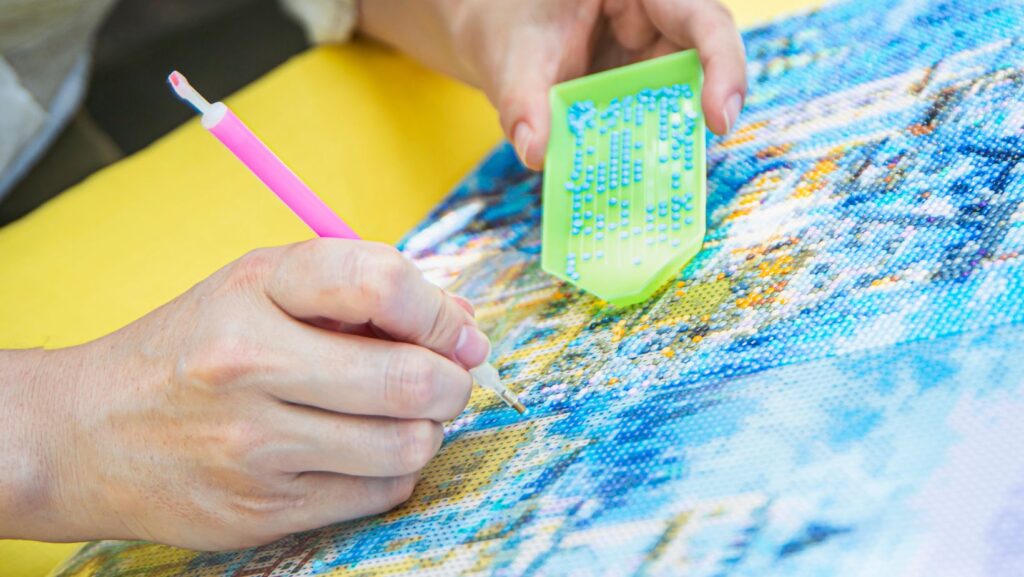
Understanding the Components
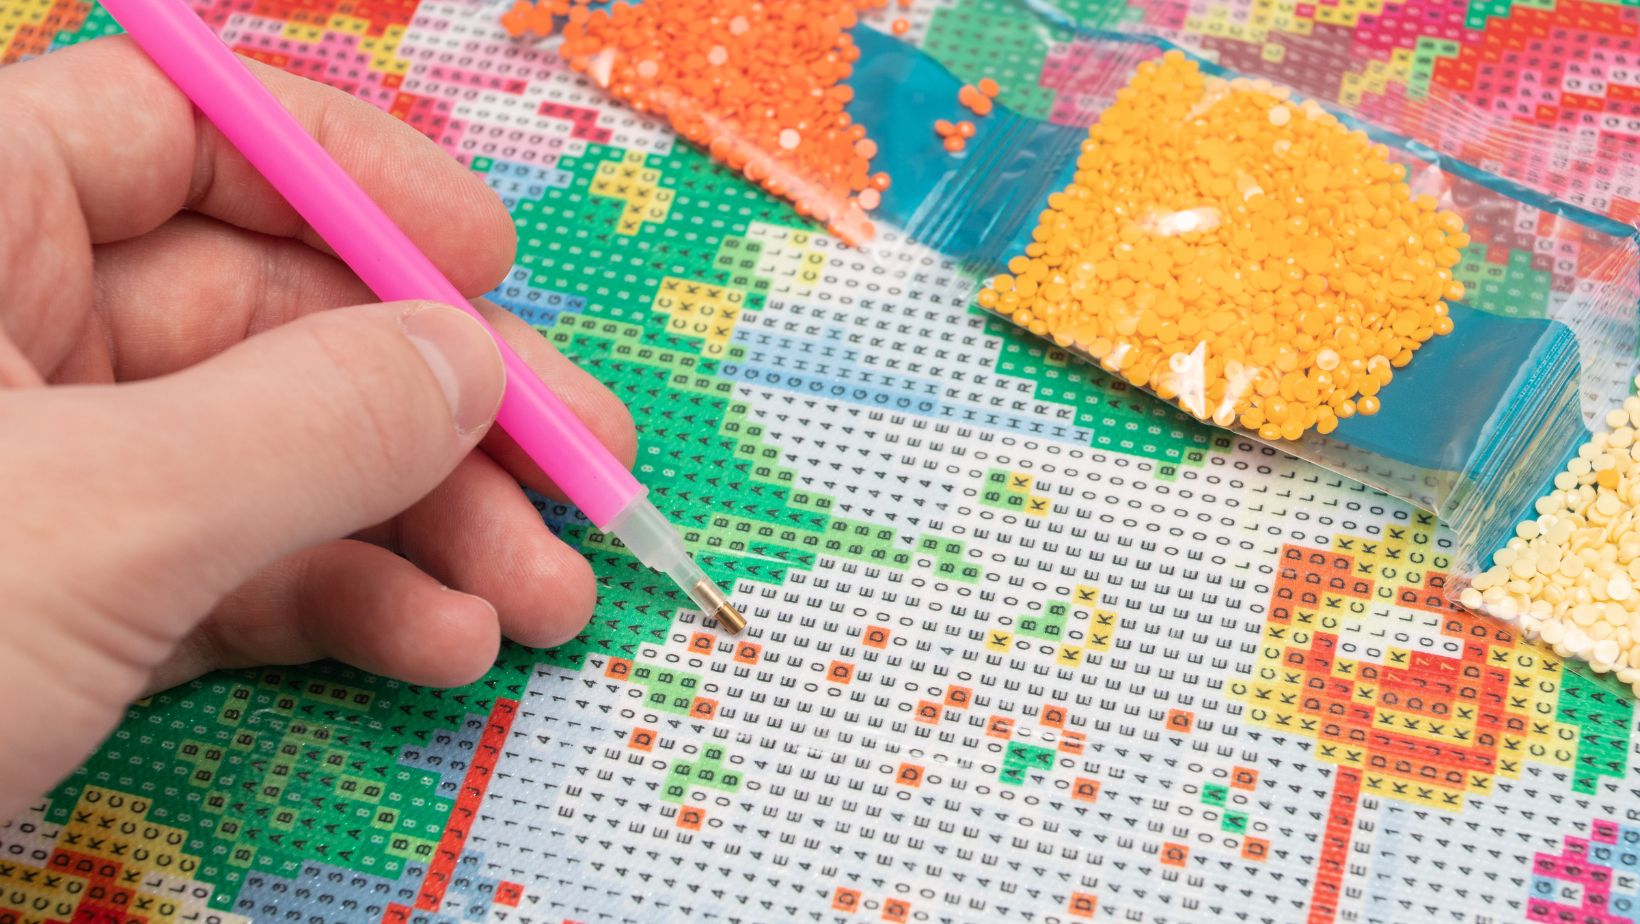
The canvas features a pre-printed design covered by a protective film. Symbols on the canvas correspond to specific diamond colours listed in the colour chart.
Essential tools in standard kits:
- Applicator tool: Picks up and places drills
- Wax pad: Creates adhesion between tool and drills
- Sorting tray: Organizes drills for placement
- Storage containers: Keeps colours separate
The quality of drills matters greatly. Good drills have consistent size, shape and faceting for proper light reflection.
Preparing Your Workspace
Choose a clean, flat surface with good lighting. A light pad can improve symbol visibility and reduce eye strain.
Keep these items within reach:
- Microfibre cloth for cleaning
- Small container for active drills
- Zip-top bags for storage
- Ruler or straight edge
- Anti-static cloth
Roll the canvas flat and secure the corners with tape if needed. Work in small sections by peeling back the protective film 10-15 cm at a time to prevent dust contamination.
Advancing Your Craft
As crafters progress with diamond art, they develop techniques to create more intricate and polished pieces. Mastering proper tool handling and organization leads to stunning results.
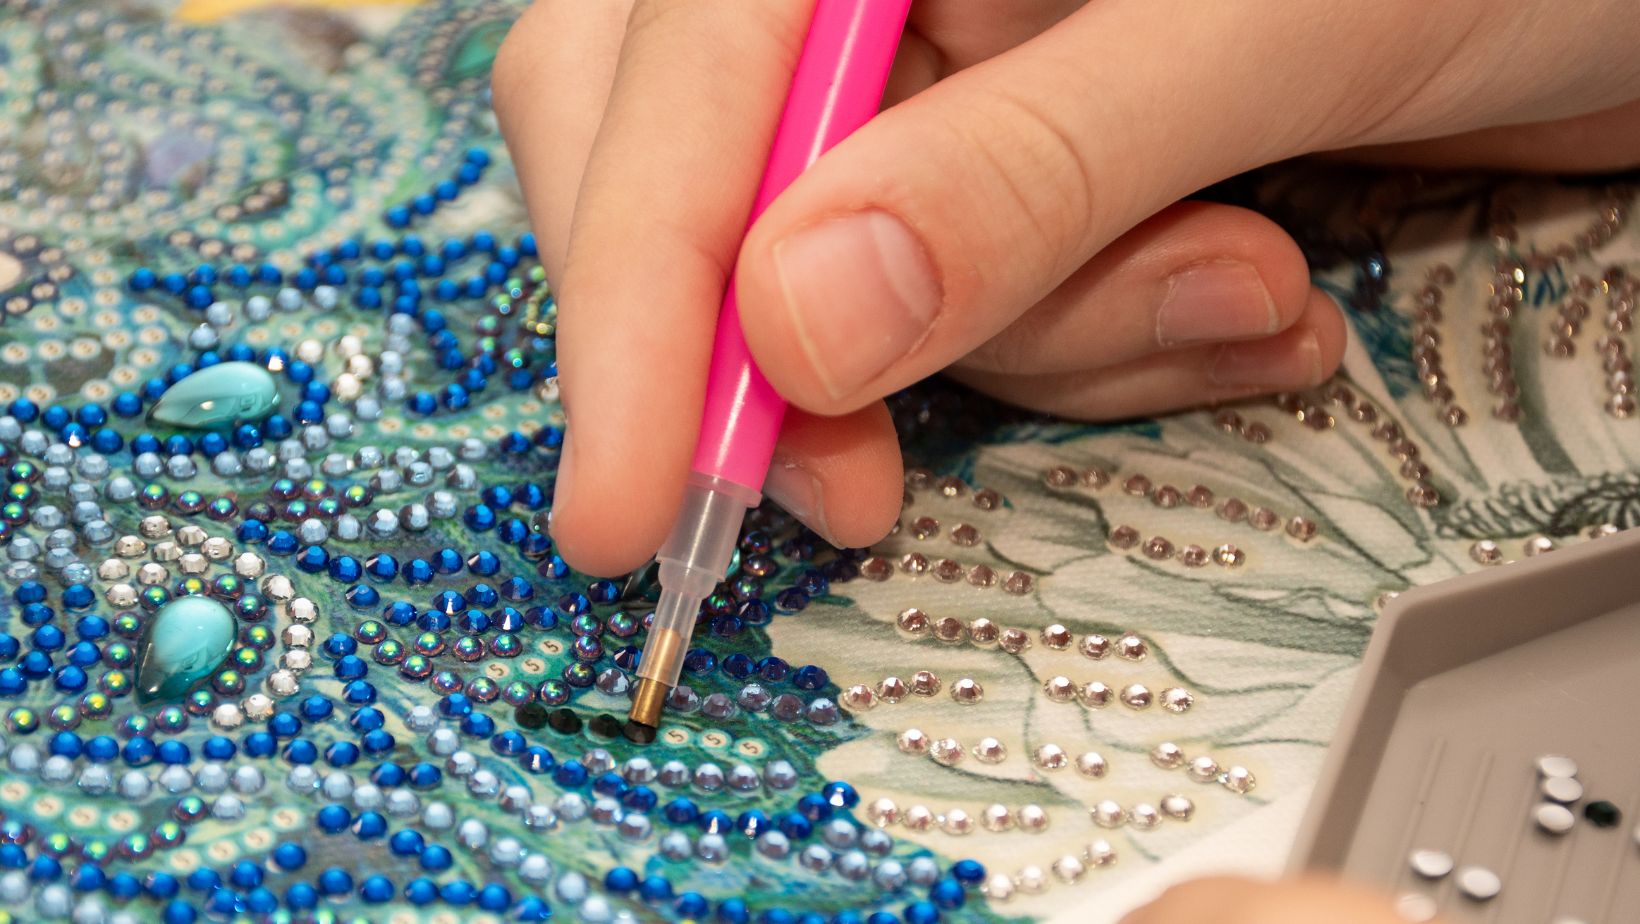
Applying Diamonds
A steady hand and proper technique make diamond placement precise and efficient. The diamond pen should be held at a 45-degree angle for optimal control.
Always check the colour chart before placing diamonds to avoid mistakes. Keep resin diamonds in labelled storage boxes to prevent mixing.
Expert crafters use light pressure when picking up diamonds with tweezers or the applicator pen. This prevents damage to the adhesive surface.
Place 3-5 diamonds at a time to maintain a steady workflow. Take short breaks to prevent hand fatigue and maintain accuracy.
Finishing and Framing Your Artwork
Inspect the completed artwork under good lighting to spot any missing diamonds. Press each section gently with a rolling tool to ensure proper adhesion.
Store leftover diamonds in small containers for future touch-ups. Label each container with the corresponding colour code.
Professional framing protects the shimmering masterpiece from dust and damage. Choose a frame with UV-protective glass to prevent fading.
Clean the finished piece with a soft, dry brush before framing. Allow the artwork to settle for 24 hours before handling.
Creating Custom Patterns and Kits
Convert favourite photos into diamond painting patterns using specialized software. Select high-contrast images for the best results.
Custom templates work best with images that have clear focal points and defined edges. Adjust the size and complexity based on skill level.
Choose between round and square diamonds when designing custom patterns. Square diamonds create seamless coverage, while round diamonds offer easier placement.
Test small sections of custom patterns before starting large projects. This helps identify potential issues with colour mapping or detail clarity.
Conclusion
Diamond art provides an engaging creative outlet that anyone can master with the right tools and techniques. The straightforward process of placing tiny resin diamonds onto a pre-printed canvas creates stunning mosaic artwork.
Starting with simple kits helps build confidence and skill. With proper workspace setup, organized supplies, and attention to detail, crafters can produce beautiful pieces worthy of display.
Diamond painting offers a rewarding blend of relaxation and artistic expression that continues to attract new enthusiasts across Canada and beyond.