Wood wall panels are one of the easiest ways to transform a plain room into a warm, architectural space. Whether you’re upgrading a living room, bedroom, or home office, installing wood wall panels is a beginner-friendly DIY project when you follow the right steps.
This guide walks you through everything you need to know, from preparation to finishing touches, so you can install your panels with confidence.
Why Choose Wood Wall Panels?
Wood wall panels instantly introduce natural warmth and rich texture into a space, making even the simplest room feel more refined and inviting. The organic grain patterns and tonal variation of real wood create depth that paint alone simply cannot achieve.
They also enhance the perception of height, particularly when installed in a vertical layout. Vertical wood wall panels draw the eye upward, making ceilings appear taller and rooms feel more spacious and architecturally balanced.
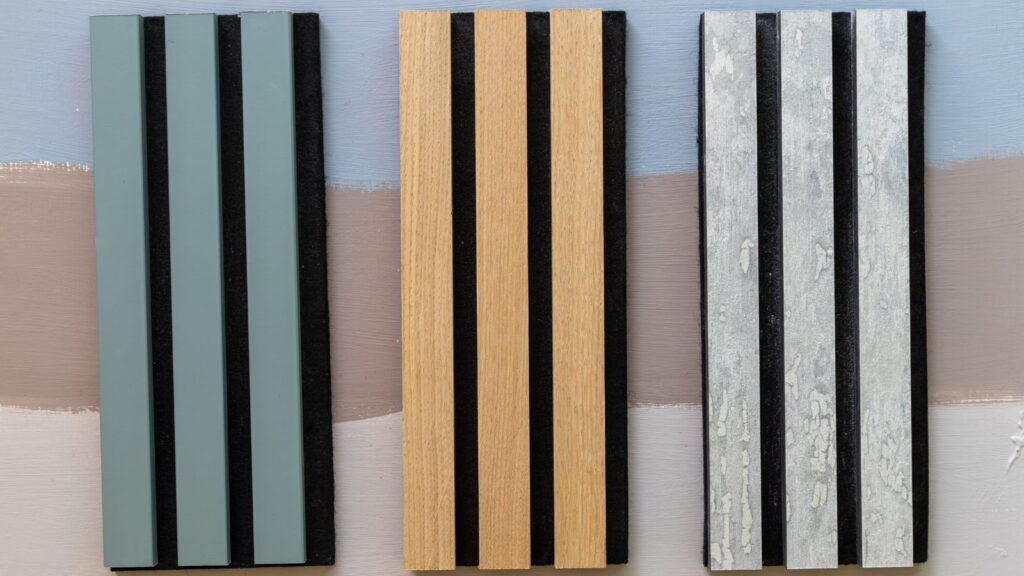
For those looking to improve sound quality, slatted acoustic wood wall panels offer both visual appeal and functional benefits. The felt backing and wood slats help absorb sound, reducing echo and creating a more comfortable acoustic environment in living rooms, home offices, and media spaces.
How Long Does Wood Wall Panels Installation Take?
For a standard feature wall, installation is typically a one-day project for beginners. The measuring and preparation stage usually takes around one to two hours, depending on the size of the wall and how much surface prep is required.
Once everything is measured, marked, and ready, the installation itself generally takes between two to four hours. This timeframe can vary based on your experience level, the type of panels you’re using, and whether any cutting is required for outlets or corners.
In most cases, with proper planning and the right tools on hand, beginners can comfortably complete an entire wall within a single day.
Tools & Materials You’ll Need
Before starting, gather these essentials:
- Wood wall panels
- Construction adhesive
- Screws (black screws for acoustic panels)
- Stud finder
- Level
- Measuring tape
- Circular saw or fine-tooth hand saw
- Drill
- Safety goggles and gloves
Having everything ready beforehand makes installation faster and smoother.
Step-by-step Installation
Step 1: Measure Your Wall
Accurate measurements are the foundation of a clean installation.
- Measure the height and width of your wall.
- Calculate how many panels you need.
- Decide your layout (full wall coverage or feature wall).
If installing vertical wood wall panels, make sure your ceiling height matches panel length. Some panels can be trimmed easily to fit.
Pro tip: Always order 5-10% extra material to account for cutting adjustments.
Step 2: Prepare the Surface
Your wall should be:
- Clean
- Dry
- Smooth
- Structurally sound
Remove nails, fill large holes, and wipe away dust. Panels can be installed directly over drywall, plaster, or even existing flat surfaces.
If mounting into studs for extra security, use a stud finder to mark stud locations.
Step 3: Plan Your Starting Point
Where you begin affects the final look.
For most installations:
- Start from one corner and move across
- Use a level to ensure your first panel is perfectly straight
- Leave a small expansion gap (about 2–3mm) along edges if recommended by the manufacturer
A perfectly aligned first panel ensures the rest will line up correctly.
Step 4: Cut Panels to Size
If needed, trim panels using:
- A circular saw for straight cuts
- A fine-tooth saw for precision
Always cut from the back side to protect the veneer surface. Wear protective gear and measure twice before cutting.
For outlets or switches, mark the cutout area carefully and use a jigsaw.
Step 5: Install the Panels
There are two common installation methods:
1. Adhesive Method (Beginner-Friendly)
- Apply construction adhesive to the back of the panel
- Press firmly against the wall
- Hold in place for 20–30 seconds
This method works well for flat, even walls.
2. Screw Method (Recommended for Acoustic Panels)
- Position panel against wall
- Drill screws through the felt backing into studs
- Use 15–20 screws per panel for secure installation
This method provides stronger support and easier removal in the future.