Losing a front tooth in your 30s can feel personal and urgent, but replacing it with an implant gives you a natural-looking, long-term solution that restores function and appearance. If you need an emergency dentist in Ocala, FL, acting quickly can help preserve the site and improve your implant outcomes — an implant can match your smile and bite while preserving jawbone health, and the typical path involves a staged timeline with predictable recovery steps you can plan for.
You’ll want to weigh aesthetic details — shade, shape, and gum contours — alongside the practical timeline from extraction to final crown and the short-term recovery needs like swelling control and soft foods. The next sections walk through appearance choices, the surgical and healing stages, and clear aftercare steps so you know what to expect and how to protect your new tooth.
Key Aesthetic Considerations for Adults in Their 30s
Your front-tooth implant should match adjacent teeth in color and shape, sit naturally within the gumline, and maintain a stable appearance over years. Focus on shade selection, crown anatomy, gum contours, and material choices that will age well with your smile.
Matching Natural Tooth Color and Shape
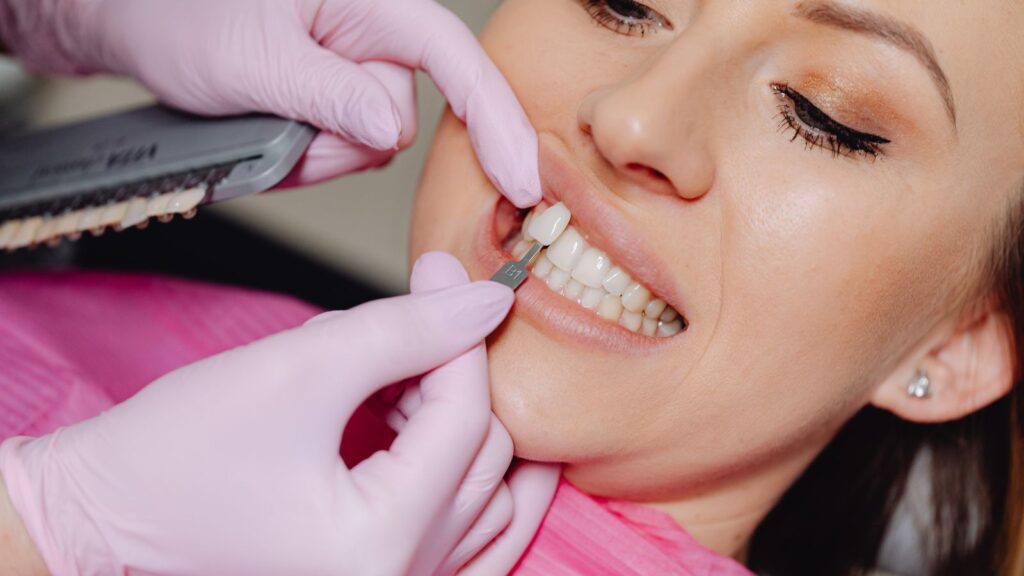
You need a crown that replicates the translucency and hue of surrounding teeth. Ask for digital shade-matching and photos under natural light; porcelain or layered zirconia crowns let technicians mimic subtle edge translucency and internal color depth.
Shape matters for function and appearance. Provide photos of your smile from different angles so the lab can reproduce incisal edge length, facial convexity, and contact point relationships.
Request a provisional (temporary) crown first. It lets you test shape and shade for weeks, and your dentist can adjust contours or brightness before the final restoration is fabricated.
Gum Contour and Smile Line Harmony
Healthy, symmetrical gum tissue frames the front tooth and affects how natural the implant looks. Your implant crown should align with the neighboring gingival margins and papillae height to avoid black triangles or excess tissue exposure.
If bone or soft tissue is deficient, consider connective-tissue grafts or minor ridge augmentation at the time of implant placement. These procedures help recreate a natural emergence profile and support the papilla between teeth.
Evaluate your smile line—how much gum shows when you smile. If you display a high smile line, demand precise tissue sculpting and shade matching since any mismatch will be more visible.
Long-Term Appearance of Dental Implants
Plan for how materials and tissues will age together. Natural teeth can darken or wear; choose a crown material and shade that can be maintained or adjusted over time with minimal invasive work.
Monitor peri-implant tissue health regularly. Receding gums or bone loss will change the implant’s exposed portion and may require soft-tissue treatment or crown modification to preserve aesthetics.
Maintain oral hygiene and schedule professional cleanings every 3–6 months initially. Early detection of staining, wear, or tissue changes gives you simpler options to restore a consistent, natural look.
Implant Timeline: Stages and What to Expect
You will move through four main phases: planning and imaging, any necessary extraction or grafting, implant surgery and osseointegration, then the final crown and fine adjustments. Each phase has predictable steps, timelines, and typical sensations so you can plan appointments, work, and recovery.
Consultation and Planning Phase
Your first visit focuses on diagnosis and a customized plan. The dentist or oral surgeon will take 3D cone-beam CT scans and intraoral photos to measure bone volume, root positions, and nearby tooth roots. Expect discussion of options (immediate versus delayed implant, bridge, or temporary prosthesis), risks, and costs.
If your bone is insufficient, your provider will recommend a bone graft or ridge augmentation and explain how that affects timing. Typical paperwork includes medical history, consent, and a treatment timeline. You may receive a provisional crown plan if appearance matters during healing.
Tooth Extraction and Site Preparation
If the front tooth is still present or damaged, your provider will schedule an extraction. Your surgeon will use atraumatic techniques to preserve surrounding bone and the gum profile for the best aesthetic outcome. Expect local anesthesia; sedation is optional and discussed during planning.
If they detect infection or inadequate bone, they may perform a bone graft or socket preservation at the same visit. Grafting can add 3–6 months to the timeline for graft consolidation before implant placement, depending on graft type and healing. You’ll get post-op instructions on oral hygiene, diet, and medications to control swelling and prevent infection.
Implant Placement and Healing
During implant surgery, the titanium implant is placed into your jawbone under local anesthesia, often with minimal incisions for front-tooth cases. The procedure typically takes 30–90 minutes for a single implant. Your provider may place a temporary crown or a healing abutment depending on primary stability and aesthetic needs.
Osseointegration follows: the implant bonds to bone over 6–16 weeks in most healthy adults. Expect mild-to-moderate soreness the first 72 hours and limited swelling for a week. You should follow a soft-food diet and maintain careful hygiene around the site. Routine follow-up visits at 1–2 weeks and monthly checks monitor healing and detect any early problems.
Final Restoration and Adjustments
Once the implant is stable, your provider takes precise digital or conventional impressions for the final crown. The lab fabricates a custom zirconia or porcelain-fused-to-zirconia crown to match shade, translucency, and the gumline. Try-in appointments let you evaluate shape, bite, and color; expect 1–2 adjustment visits.
The crown is permanently cemented or screwed onto the abutment. Your clinician verifies occlusion and makes small bite adjustments. After delivery, you’ll be advised on daily care, occasional professional maintenance, and signs that require prompt attention, such as persistent pain, mobility, or gum inflammation.
Recovery and Post-Procedure Care for Implant Patients
Expect a few days of soreness, light bleeding, and swelling, followed by gradual improvement. You will follow specific pain control, diet, and hygiene steps to protect the implant and support bone healing over the next several months.
Immediate Recovery Experience
You will likely feel numbness for 2–6 hours after local anesthesia; avoid chewing until sensation returns. Minor bleeding or oozing for 12–24 hours is normal; bite on gauze with gentle pressure for 20–30 minutes if bleeding continues.
Swelling typically peaks at 48–72 hours and then decreases. Apply an ice pack 20 minutes on, 20 minutes off for the first 24 hours to limit swelling and bruising.
Expect to eat soft foods—yogurt, mashed potatoes, scrambled eggs—for 3–7 days. Avoid straws, alcohol, smoking, and vigorous rinsing during the first week to prevent dislodging the blood clot.
Managing Discomfort and Swelling
Take prescribed analgesics and antibiotics exactly as directed. If your surgeon prescribes NSAIDs (ibuprofen) or acetaminophen, use them on a schedule for the first 48–72 hours to keep pain controlled rather than waiting for severe pain.
Use ice for the first day, then switch to warm compresses after 48–72 hours to promote circulation and reduce residual swelling. Sleep with your head elevated for 2–3 nights to minimize edema.
Watch for signs of infection: increasing pain after 72 hours, spreading redness, fever, or pus. Contact your dentist immediately if these occur. Keep scheduled follow-up visits to monitor healing and remove sutures if necessary.
Oral Hygiene Guidelines During Healing
Keep the surgical area clean to lower infection risk. Starting 24 hours after surgery, gently rinse with warm saline (1/2 teaspoon salt in 8 oz water) 3–4 times daily, especially after meals.
Brush remaining teeth as usual but avoid brushing the surgical site directly for the first 7–10 days. When cleared by your clinician, use a soft-bristled brush and short, gentle strokes around the implant.
Avoid alcohol-based mouthwashes and strong antiseptics unless your provider prescribes them. If given chlorhexidine rinse, use it exactly as directed for the specified duration to reduce bacterial load without impairing tissue healing.