Do you want to protect your boat from harsh weather, stop paying expensive marina storage fees, and actually feel confident knowing your vessel is safe all winter long? Then building your own backyard boat storage shed is one of the most practical projects you can take on as a small boat owner. It costs a fraction of what most marinas charge for seasonal storage, and when it is done right, it keeps your hull, motor, and trailer dry and ready for the water every single season.
This guide walks you through the entire build process, step by step, in a way that any capable homeowner can follow over a single weekend — or two relaxed ones. You do not need to be a professional contractor. You need accurate measurements, the right materials, and a clear plan before the first board goes down.
1. Start With a Solid Plan Before You Buy a Single Board
Rushing to the lumber yard before you have a clear plan is how weekend projects turn into month-long headaches. The planning stage does not take long, but it shapes every decision that follows.
Know Your Boat’s Dimensions Before You Design Anything
The shed needs to fit your boat — not the other way around. Measure your boat from bow to stern, then account for the full length of the trailer. Add at least two feet of clearance on all sides so you have room to walk around the vessel, open hatches, and work on it comfortably during the off-season.
A common size for a small recreational boat shed is 12 feet wide by 24 feet long, with an 8- to 10-foot ceiling height. If your boat has a T-top, a radar arch, or a tall center console, bump the ceiling height up accordingly. Write those dimensions down and sketch a rough floor plan on paper before anything else happens.
Check Local Zoning Rules and HOA Guidelines First
Before purchasing a single piece of lumber, contact your local municipality about permit requirements for accessory structures. Many jurisdictions allow small sheds without a full building permit up to a certain square footage, but a structure large enough to house a boat often crosses that threshold. A quick call to your local building department takes ten minutes and can save you from having to tear the whole thing down later.
If your neighborhood has a homeowner’s association, review the rules on outbuildings carefully. Some HOAs restrict exterior finishes, roof colors, or the placement of storage structures within the property. Getting clarity on this before you break ground saves a significant amount of frustration.
2. Choose the Right Materials for a Weather-Ready Structure
The materials you select determine how long the shed holds up and how much maintenance it needs over the years. Cutting corners here tends to mean replacing boards, fixing leaks, or repainting far sooner than expected.
Framing and Structural Lumber
Pressure-treated lumber is the right choice for the floor frame since it sits closest to the ground and will be exposed to ground moisture year-round. For wall framing and the roof structure, standard construction-grade 2x4s or 2x6s work well for a small to mid-size shed. Size up to 2×6 wall studs if you plan to add insulation — which is worth considering in climates with hard freezes.
For exterior sheathing, oriented strand board (OSB) is cost-effective and structurally solid. If your budget allows, plywood sheathing is slightly more resistant to moisture and holds fasteners better over the long term. Either option does the job when it is properly sealed and protected.
Roofing and Siding That Hold Up Outdoors
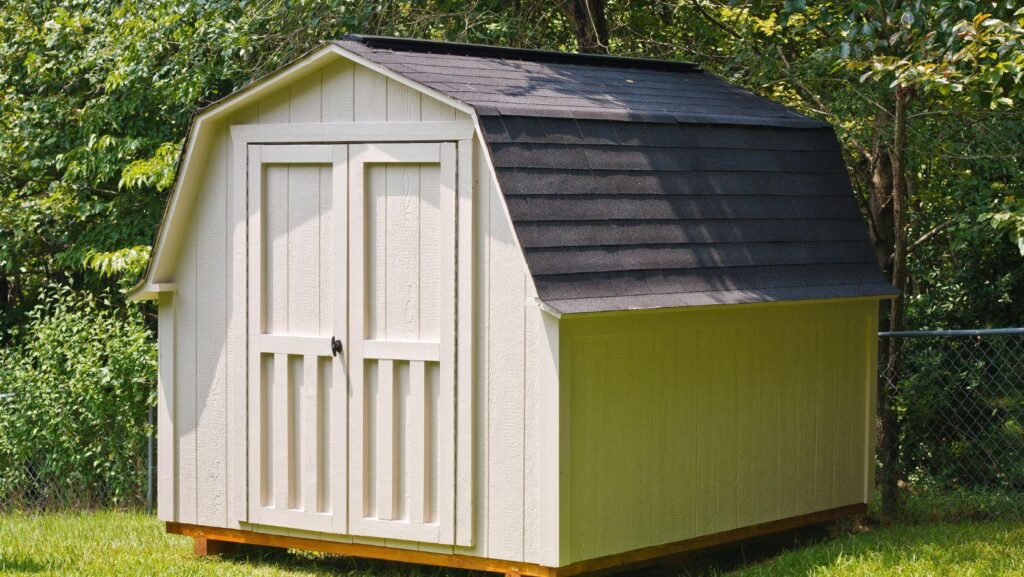
Architectural asphalt shingles are the most practical roofing choice for a residential DIY build. They are affordable, widely available, easy to install, and provide solid protection against rain, snow, and UV exposure. A simple gable roof works very well for a boat shed and gives you reliable drainage on both sides of the ridge.
For siding, T1-11 panel siding is a popular option because it installs quickly, looks clean, and handles outdoor conditions well when properly sealed and painted. Fiber cement siding is a more durable alternative that requires almost no ongoing upkeep, though it costs more upfront and is heavier to work with on a DIY build.
3. Prepare the Ground and Lay a Solid Foundation
The foundation supports everything above it. A structure that shifts, settles unevenly, or sits in standing water will show problems within the first year. Taking the time to get the groundwork right pays off for as long as the shed stands.
Gravel Pad or Concrete Slab: Pick the Right One for Your Yard
A compacted gravel pad is the quickest and most affordable foundation option for a boat shed. You excavate 4 to 6 inches of soil, fill the area with crushed gravel, compact it thoroughly, and frame your shed floor above it on pressure-treated skids or concrete block piers. This approach drains well, handles minor frost heave without cracking, and is straightforward to build without professional help.
A poured concrete slab is more permanent and gives you a flat, stable surface that makes rolling a boat and trailer in and out of the shed very smooth. It is the better choice if your yard has drainage issues or if you want to do oil changes and motor work inside the shed. Pouring a full slab adds a day or two to your timeline, but it is a one-time job that lasts the life of the structure.
Level the Site Before You Frame a Single Wall
Use a long level and stakes to check the grade of your chosen site. Even a slight slope becomes a real problem once you are framing walls that need to be plumb and square. Take the time to cut away high spots and fill in low ones before you begin. If you are setting piers or concrete blocks, adjustable post bases make it much easier to establish a level starting point across the full footprint of the shed.
4. Frame the Walls and Set the Roof Structure
Framing is where the shed stops being a concept and starts looking like a real building. This is also the stage where having a second set of hands makes everything go faster and safer. If you can recruit a friend or family member for at least this part of the build, do it.
Build and Set the Floor Frame First
Build the floor frame flat on the ground, then raise it onto your foundation. Use pressure-treated lumber for the perimeter and set floor joists 16 inches on center for a solid, firm deck. Once the frame is in place and confirmed level, sheathe it with 3/4-inch tongue-and-groove plywood. This gives you a sturdy platform to stand on while framing the walls.
If you are using a concrete slab instead of a framed floor, you will anchor your bottom wall plates directly to the slab with anchor bolts set in the concrete. In that case, the slab is your floor, and you can leave it bare or add rubber mat flooring once the rest of the build is complete.
Raise the Walls and Keep Them Plumb as You Go
Frame each wall section flat on the floor platform, then tip it up into position and fasten it to the deck. Start with the two long sidewalls, brace them with temporary 2×4 diagonal bracing so they do not shift or fall, then add the gable-end walls. Use a framing square and a long level throughout this process. A wall that is even slightly out of plumb will make every step that follows — door installation, roof framing, trim work — harder than it needs to be.
Once all four walls are up, connected at the top plate, and confirmed plumb, cut your ridge board and set your common rafters. A 4-in-12 or 6-in-12 roof pitch is manageable for a DIYer and sheds rain and snow effectively. Cut the bird’s mouth on each rafter carefully so it sits flat and square against the top plate without rocking.
5. Install the Roof and Weatherproof the Exterior
A shed that is not fully weathertight is not really protecting your boat — it is just giving rain a slightly more complicated path to get in. Take the roofing and sealing steps seriously, because this is what separates a structure that lasts from one that causes problems every season.
Sheathe the Roof and Lay the Underlayment
Once the rafters are set, sheathe the roof deck with 1/2-inch or 5/8-inch OSB or plywood, then roll out synthetic roofing underlayment across the entire surface. Overlap each row by at least six inches and work from the bottom of the roof upward. The underlayment is your secondary layer of water protection — even with quality shingles above it, this layer does important work during heavy rain and wind-driven storms.
Install metal drip edge along the eaves first, then along the rakes. Nail your asphalt shingles starting at the bottom edge and working upward in overlapping rows. Finish the ridge with cap shingles or a ridge vent if you want passive airflow inside the shed during hot summer months.
Seal Every Joint and Paint the Exterior Before Winter
Before painting, caulk all seams, corners, and joints where water could get behind the siding panels. Use a quality exterior caulk rated for wood. Pay close attention to the seams around the door frame and anywhere siding meets trim boards — these are the spots where water most commonly finds a way in.
Apply two coats of exterior paint or a solid stain over the entire surface. Choose a color that works with your home’s exterior. A shed that looks intentional and well-maintained tends to stay out of the crosshairs of neighbors and municipality inspectors alike, and the paint keeps the wood protected for years before it needs another coat.
6. Hang the Doors and Set Up the Interior
The door is one of the most important features of the entire shed. Get it right and moving the boat in and out every season becomes simple. Get it wrong and you will be wrestling with it every single time.
Size the Door Opening for Your Boat and Trailer
A standard 8-foot-wide door opening clears most small recreational boats on trailers without too much difficulty. If your boat is wider, or if you want comfortable margin for maneuvering in the driveway approach, go to 10 or even 12 feet. Double swing doors and sliding barn-style doors are both practical options for a structure this size. Sliding doors require a clear track path on one side, so think through your layout before committing to that style.
Frame the door opening with solid 2×6 doubled headers to span the width without sagging. Install a heavy-duty hasp and padlock — boat storage sheds attract opportunistic theft, and a solid lock is cheap compared to what it protects.
Organize the Interior So It Actually Works for You
Once the boat is inside, you want to be able to walk around it, access gear, and work on the motor without constantly bumping into things. A few simple additions make the interior far more functional:
Keep the floor area as open as possible. The boat needs a clear path in and out, and you need room to walk the full perimeter when you are prepping it for storage or pulling it out in the spring.
7. Prep Your Boat Before It Goes In for the Season
The shed is built. Now comes the part that actually protects your investment long-term — getting the boat properly prepared before it sits for weeks or months at a time.
Clean and Inspect the Hull and Trailer Thoroughly
Give the hull a complete wash and close inspection before anything goes into storage. Look for stress cracks, impact damage, or blistering on the fiberglass. Small cracks are easy to repair now and become expensive problems if left untreated through a cold winter. Check the trailer’s wheel bearings, tire pressure, and lighting connections. Grease the bearings, inflate the tires to the manufacturer’s recommended storage pressure, and tighten any loose fasteners you find.
If your boat has a bilge, make sure it is completely dry before the doors close for the season. Trapped moisture is the starting point for mold, mildew, and wood rot — none of which you want to discover when spring finally arrives.
Service the Outboard and Think About Next Season’s Performance
Before wheeling your boat into the new shed for the off-season, it’s also the perfect time to service your outboard — and if you want better performance on the water next year, consider installing a jack plate to fine-tune your motor’s height and setback. Change the lower unit gear oil, flush the cooling system thoroughly with fresh water, fog the cylinders with fogging oil, and replace the fuel filter. If your motor has been running rough or burning more fuel than usual, diagnosing it now is far better than discovering the problem on launch day in the spring.
Cover the boat with a properly fitted cover or a breathable canvas tarp that allows air circulation while blocking dust, insects, and debris. Avoid standard plastic tarps — they trap moisture underneath and can cause more damage to upholstery and hardware than the weather itself would over a long storage period.
A Weekend of Work That Pays Off for Years
A well-built backyard boat storage shed pays for itself quickly. Marina storage fees for a small recreational boat can run $50 to $150 or more per month depending on your location, which adds up to $600 to $1,800 per year just to keep your boat somewhere dry. A solidly built backyard shed, done right the first time, can cost a similar amount to construct and then serves you for 20 years or more at no ongoing cost.
Beyond the savings, there is something genuinely satisfying about having your boat at home. You can check on it any time, work on it on your own schedule, and pull it out in the spring knowing exactly what condition it is in. When the season opens up, your boat comes out clean, protected, and ready to go — because you built the right place to keep it.