
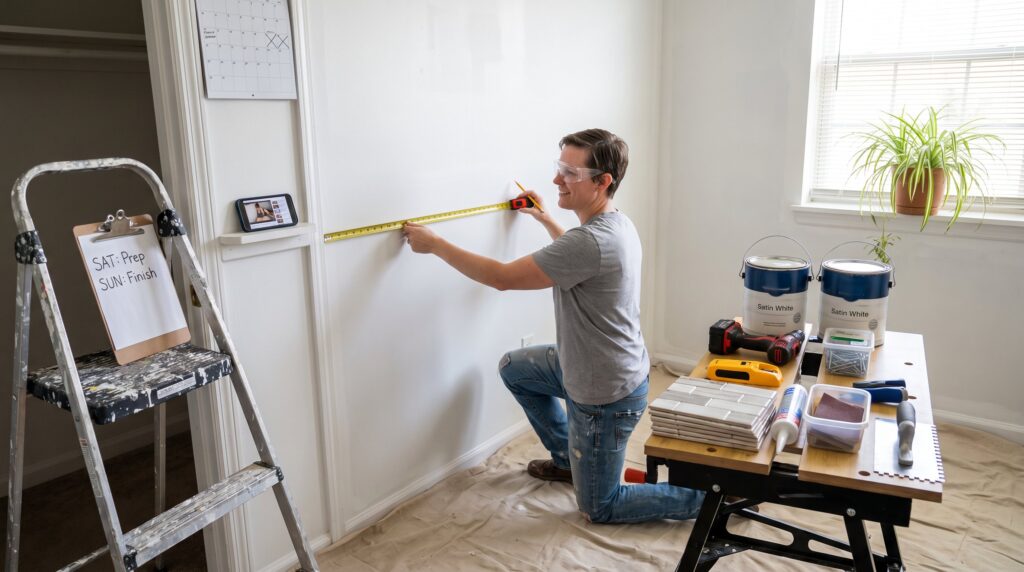
A Beginner’s Guide to Planning a Weekend DIY Project starts with a clear promise: finish a useful home upgrade in 12–18 hours. This guide helps readers pick a doable task, gather materials, and follow a timeline so the project completes before Monday. It assumes basic tools and modest skills. The goal is one clear outcome for one room, not a chain of half‑done fixes. The tone is practical and direct so readers can picture steps, estimate time, and avoid common mistakes that turn a weekend into a month.
Key Takeaways
- Planning a weekend DIY project starts with selecting a manageable task that fits the 12–18 hour timeframe and matches your skill level.
- Set a clear, realistic goal focusing on one room and one measurable outcome to ensure project completion before Monday.
- Prepare thoroughly by listing all materials and tools with a 10–25% extra budget contingency to avoid mid-project delays.
- Follow a structured timeline: prepare beforehand, dedicate Saturday to demo and installation, and use Sunday for finishing touches and quality checks.
- Avoid complex or high-risk tasks requiring specialized tools or licenses to keep your weekend DIY project safe and achievable.
- Visualize the project steps in advance and test ideas quickly with measurements and risk assessments to confirm suitability for a weekend DIY.
Why Choose a Weekend DIY Project — Benefits, Realistic Goals, and When To Say No
Fact first: a weekend DIY project gives visible results with limited time and disruption. Benefits include solving a nagging problem, improving a single room, and learning one new skill in a low‑risk setting. For example, repainting a 10×12 bedroom or installing three floating shelves typically fits the 12–18 hour window and restores a sense of control.
Weekend projects work when goals are narrow. Choose one room and one measurable finish: fresh paint, one shelving wall, or a new backsplash area about 4–6 square feet. A realistic goal means completing demolition, installation, and finish work in two focused days. Add a rule: if a task needs more than two unfamiliar tools or a licensed trade (electrical or gas), say no. That rule prevents costly mistakes like miswired outlets or pressure leaks that require professionals to fix.
A short honest example: a homeowner tried to rewire two recessed lights without prior experience. The job doubled in time and cost. The lesson: pick projects where mistakes are easy to reverse, paint, sanding, or installing hardware, so learning stays affordable.
Practical warnings: avoid structural changes, major plumbing reroutes, and any work that will void insurance if done incorrectly. If uncertainty remains, consult a local pro or use a focused how‑to checklist such as the site’s advice on planning ahead to decide whether to proceed.
How To Pick the Right Weekend Project for Your Skill Level and Space
Answer first: match project difficulty to experience, time, and the physical space available. Beginners should pick simple repairs, painting, shelving, or small decor upgrades that use common tools.
Start by listing three constraints: time available (12–18 hours), tools on hand, and how the space is used. For example, a renter with a 6‑hour Saturday and a drill can install peel‑and‑stick backsplash tiles behind a stove (partial work) or mount two shelves in a living room. A homeowner with two free days and a circular saw could build a small planter box or new closet shelf.
Use visualization: sketch the finished result on paper and walk through each step mentally. If any step requires a new specialized skill, like drywall mudding or soldering, either practice on scrap material first or pick a simpler option. The site’s roundup of weekend DIY transformations helps spark realistic ideas for outdoor and indoor spaces. Readers can get more context from the site guide.
Test the idea quickly: measure the area, check for hidden issues (water, wiring), and imagine cleanup. If the idea survives two quick checks, measurements and risk scan, it’s likely fit for a weekend. For more structured prep, readers can follow the tested method from the article on how to test a DIY idea before committing which shows low‑cost trial steps.
Materials, Tools, Budgeting, and Where To Buy Smart
Key point first: list every item, then add 10–20% extra for waste and a 15–25% budget contingency. An accurate parts list prevents mid‑weekend runs to the store and saves hours.
A practical checklist: materials (paint, tile, screws), tools (drill, level, stud finder), fasteners (screws, anchors), consumables (sandpaper, caulk), and safety gear (gloves, goggles). For a small backsplash project, a realistic parts list could be: 6 sq ft of tile, one tube of adhesive, 1 lb of grout, 20 tile spacers, a notched trowel (or rental), and a silicone sealant, plus 10% extra tile.
Budget rule: set a cap and add contingency. If planned spend is $150, lock the cap at $175–190. That prevents feature creep like switching to premium tiles mid‑project. Buy standard materials from local home centers: rent or borrow specialty tools like tile saws or nail guns from tool libraries. Many hardware stores also offer day rentals for $20–$50, cheaper than buying a tool used twice a year.
Practical tip: pre‑buy everything and stage it in the workspace the night before. That saves roughly 2–3 hours typically lost to mid‑project runs. For supplies and broader idea lists, UsefulIdeas.net offers a compact guide to small home improvements that pair well with weekend builds. Also keep in mind a contingency line in the budget for design tweaks or unexpected waste.
A Practical Step-By-Step Weekend Timeline You Can Follow
Answer up front: follow a three‑part timeline, prep, execute, finish, and assign clear tasks to Saturday and Sunday.
Before the weekend: read one full tutorial start‑to‑finish: pre‑buy all materials: clear and protect the workspace: charge batteries: and lay out tools in order. The night before, tape drop cloths and label parts. These prep actions commonly save 3–5 hours during the weekend.
Saturday morning (3–5 hours): measure, mark, and do any demolition or surface prep. Confirm measurements twice. Example: when painting a 12×12 room, mark trim lines, sand glossy spots, and patch holes, these steps reduce rework later.
Saturday afternoon (4–6 hours): main cutting, assembly, or installation. Work in time blocks of 60–90 minutes with 15‑minute breaks. For a shelving install, this means find studs, mount brackets, and hang shelves. If a cutting or adhesive step needs drying time, use that window for cleanup and tool sharpening.
Sunday (4–5 hours): finishing, sanding, painting, caulking, sealing, then a safety and quality check. Walk the space as a user: open drawers, sit on seats, test lights. If an item fails, fix small issues immediately rather than postponing. Post‑project, photograph the result and log what worked and what to change next time.
For organization and timing hacks that keep tasks small and measurable, readers can compare methods with the site’s weekend home refresh checklist to pick finishing touches efficiently.
Conclusion
A successful beginner weekend DIY project is small in scope, well planned, and safely within skill limits. By choosing realistic goals, listing every item with contingency, and following a simple two‑day timeline, readers can finish a meaningful upgrade in 12–18 hours. UsefulIdeas.net offers related project guides and planning resources to help pick the right next task.